EQUICAST
Search Our Site
Therapeutic Hoof Care Products


Equicast® Hoof Casting & Therapeutic Shoe Application
1. Select the appropriate size shoe and style of Equicast Therapeutic Shoe for the application. The shoe should be at least as wide as the foot, or slightly wider. It is OK if some of the toe of the foot extends a little beyond the front of the shoe, as long as the width fits well and the back of the shoe is aligned with the dimple or widest part of the frog. For best results, apply the Equicast shoe while the horse is standing on (loading) the shoe. To initially attach the foot to the shoe, apply 2 screws through the hoof wall into the shoe at about a 45 angle. Do not over-tighten the screws, just make contact with the wall. For a safe application, pre-drill your holes from the foot side (starting at the inside of the white line) prior to setting the foot on the shoe. *For many of these cases and especially if you know the horse has a thin sole, it is critical to NOT TRIM sole material out of the front half of the foot. Even some exfoliating sole material will help offer support and protection.
2. Apply EDSS Sole Support Impression Material (DIM) to the outside and back of the hoof only. Start at the widest part of the foot and work your way around the heels to the other widest part of the foot. This will offer a good seal, as well as some protection and flexibility to the back of the foot and heels when wrapping the cast material. Once the DIM is applied, wrap the foot with plastic wrap to secure the material in place and allow the material to setup (about 5 -8 minutes).
3. Remove the plastic wrap once the DIM is setup and place the foot on a smaller surface block or an old Equicast shoe turned upside down. This will give you clearance when applying the cast material. Wet the cast and proceed with wrapping it around the foot making sure to stay below the hairline. Wraps should alternate slightly in height from one side to the other, and should cover both the foot and shoe as you wrap. For most applications of a size 1 or larger foot, you will generally use a full Equicast roll per foot.
4. Once the Equicast is applied, wrap the foot with plastic wrap to help retain the resin within the casting material, and to help smooth the cast until it is cured (about 5 minutes).
5. Remove the plastic wrap when the Equicast has cured and evaluate the comfort of the horse.
Troubleshooting Tips: Any discomfort seen in one or both feet, you will want to check to make sure the cast is not rubbing or invading any sensitive skin areas like the heel bulbs. If that is not found to be an issue, then you may have too much sole pressure from screw installation being too tight. If the discomfort does not improve with a little walking around, you may have to remove the shoe and loosen the screws, then re-apply the cast.
If you need further assistance, you can refer to the application video or contact us directly at: 719-372-7463
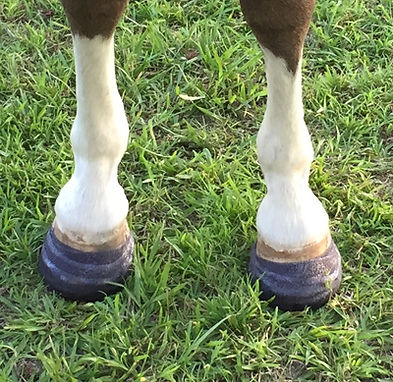
Equicast adds vertical integrity and lateral stability to the hoof capsule. Always make sure Equicast is below the hairline.